Do you want to learn how to make your slides more visually appealing?
Here's a Cool Tip: Fill a shape with a picture in Microsoft PowerPoint
Here's how to do it.
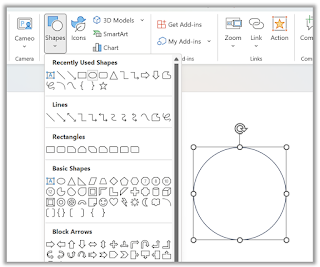
- Add a shape to your document by going to the Insert tab and selecting Shapes. Choose the shape you want and click on the slide to add it.
 |
| fig. 1 - Insert Shape |
- Select the shape by clicking on it.
- Go to the Shape Format tab that displays, click on Shape Fill in the Shape Styles section of the ribbon, and choose Picture.
 |
| fig. 2 - Shape Fill - Picture |
- Select the type of picture you want (such as From a File or Online Pictures) and then navigate to the picture you want and insert it.
- The image that you picked will then fill the shape.
 |
| fig. 3 - Shape Fill - Picture |
- You can adjust how the image is formatted within the shape using two actions: Fill or Fit.
- Click the image within the shape and go to the Picture Format tab that appears.
- Click the arrow below Crop in the Size section of the ribbon and choose either Fill or Fit.
- When you “Fill” a shape with an image, this adjusts the picture size to match the shape’s height or width, whichever is greatest.
- When you “Fit” a shape with an image, this adjusts the picture size so that both the height and width match the shape.
That's it!
READ MORE
- How to Create Graphics and Illustrations Using PowerPoint
- Use Snipping Tool to Capture Screenshots in Windows
- Draw a Perfect Straight Line, Square or Circle With This Cool Tip!
OneCoolTip.com
Cool Tech Tips for a Cooler Life!
#PowerPoint #Microsoft #Tutorial #Design #TechTip #OneCoolTip @Microsoft


No comments:
Post a Comment