Showing posts with label Microsoft Word. Show all posts

Monday, June 26, 2023

How to Set One Simple Setting Change That Will Make Your Microsoft Word Documents Look Better

Do you find the white space between pages in Microsoft Word distracting? 

Do you wish you could focus on your document without being interrupted by the gray areas? 

Here's a Cool Tip: Change the Setting to hide the white space in Microsoft Word.

When you're working in Print Layout view in Microsoft Word, you may see a gray area between pages. 

Microsoft Word with White Space
fig. 1 - Microsoft Word with White Space

This is the white space that's not visible when you print the document. 

If you find this white space distracting, you can hide it by changing a setting in Word.

Here's how to do it.
  • Open the document that you want to hide the white space in.
  • Click the File tab.
  • Click Options.
  • In the Word Options dialog box, click the Display tab.
  • In the Page display options section, uncheck the Show white space between pages in Print Layout view checkbox.
  • Click OK.
Microsoft Word White Space Setting
fig. 2 - Microsoft Word White Space Setting

  • The white space between pages will now be hidden.
Microsoft Word No White Space
fig. 3 - Microsoft Word with No White Space


Here are more Cool Tips to hide white space in Microsoft Word:
  • Double-click the gray area between pages. This will toggle the visibility of the white space.
  • Use the keyboard shortcut Ctrl+Shift+8. This will hide all non-printing characters, including the white space between pages.
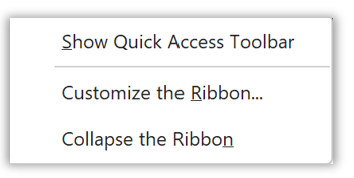
  • Use the View tab in the Ribbon. In the Show/Hide group, uncheck the White space checkbox.
  • Whichever method you choose, hiding the white space in Microsoft Word can help you to focus on your document and make it easier to read.

Enjoy!

Please Like and Share OneCoolTip.com!

READ MORE


OneCoolTip.com
http://www.onecooltip.com
Cool Tech Tips for a Cooler Life!

#Microsoft #Word  #microsoftword #wordprocessing #documentformatting #whitespace #onesimplesettingchange #productivitytips #TechTip #OneCoolTip @Microsoft

Monday, June 12, 2023

How to Stop Microsoft Word from Selecting Entire Words When You Only Want Part of It

Microsoft Word
Are you tired of Microsoft Word automatically selecting the entire word when you’re trying to select just a part of it? 

Do you find yourself constantly having to delete extra letters or words that you didn’t mean to select? 

If so, here's a Cool Tip:  Change the Selecting Entire Work option.

This change can be very useful when you need to select just a few characters in a word.

Here's how to change the setting for Microsoft Word advanced feature to NOT select “entire word when selecting text”.

  • Open Microsoft Word.
  • Click on the File tab at the top left corner of the screen.
  • Click on Options.
  • In the left menu, click on Advanced.
  • In the Editing options section, uncheck the When selecting, automatically select entire word option.
Microsoft Word Option Advanced Editing Select Entire Word
fig. 1 - Microsoft Word
Option Advanced Editing Select Entire Word

  • Click OK.

And remember, if you don't need this option, just change it back!

Enjoy!

Please LIKE and SHARE OneCoolTip.com!

READ MORE


OneCoolTip.com
Cool Tech Tips for a Cooler Life!

#microsoft #word #MicrosoftWord #AdvancedFeatures #SelectionPreferences @microsoft #techtips #OneCoolTip 

Monday, June 5, 2023

Zooming In or Out: Enhancing Your Document Experience in Microsoft Word

Do you find yourself squinting at your computer screen, struggling to read small text or get a closer look at intricate details in your Microsoft Word documents? 

Or perhaps you have a beautiful layout that you want to see in its entirety without having to scroll endlessly? 

There's a simple and efficient way to zoom in or out within Microsoft Word that allows you to tailor your document viewing experience to your exact needs.

Say goodbye to straining your eyes or missing important details.

Here's how to use it.
  • When you open a Microsoft Word document, you see a zoom slider in the bottom right corner. 
  • You can drag the slider to the left to zoom in and to the right to zoom out. 
  • You can also click on the - or + to make zooming happen in gradual increments.
  • Use the Control + Mouse wheel shortcut to zoom in or out too.
Microsoft Word Zoom

That's it.

Enjoy!

Please LIKE and SHARE OneCoolTip.com!


READ MORE

OneCoolTip.com
Cool Tech Tips for a Cooler Life!

#WordZoomHacks #OptimalViewingExperience #DocumentPrecision #EnhancedProductivity #ZoomInWord #Microsoft #Word #Microsoftword @Microsoft #TechTips #OneCoolTip 

Monday, May 15, 2023

How to Save Time and Effort with Microsoft Quick Parts

Microsoft Word
Do you often find yourself typing the same text over and over again in your emails and documents? 

Do you wish there was a way to insert reusable pieces of content with just a few clicks? 

If so, try this Cool Tip: Microsoft Quick Parts.

Quick Parts is a feature that allows you to create, store, and insert snippets of text, graphics, fields, and document properties into your Microsoft Word and Microsoft Outlook files. 

Microsoft Outlook

Y
ou can use Quick Parts to speed up repetitive tasks, such as adding directions, signatures, meeting notes, and more.

There are different types of building blocks, such as AutoText, Document Property, Field, and Header

AutoText is the most common type of building block that stores text and graphics. 

For example, you can create an AutoText entry for your email signature and insert it into any email with a few clicks.

Quick Parts are not limited to text and graphics. 

You can also use them to insert fields that display dynamic information, such as dates, page numbers, document titles, and more. 

You can also use them to insert document properties that store metadata about your file, such as author name, company name, keywords, and more.

How to Create a Quick Part


  • Select the text or graphic that you want to save as a Quick Part. You can select any amount of content, from a single word to a whole paragraph or table.

Select Text
fig. 1 - Select Text to Save as Quick Parts

  • On the Insert tab, in the Text group, click Quick Parts.
  • Click Save Selection to Quick Part Gallery.

Save Selection to Quick Parts Gallery
fig. 2 - Save Selection to Quick Parts Gallery

  • In the Create New Building Block dialog box, give your Quick Part a name and choose a gallery where you want to store it. You can also add a description, category, and options for how you want it to be inserted.

Save New Building Block
fig. 3 - Save New Building Block

  • Click OK.

Your Quick Part is now saved and ready to use.


How to Insert a Quick Part

Inserting a Quick Part is even easier than creating one. 

Just follow these steps:

  1. Place your cursor where you want to insert the Quick Part.
  2. On the Insert tab, in the Text group, click Quick Parts.
  3. Select the Quick Part that you want to insert from the gallery.

Alternatively, you can type the name of the Quick Part and press F3 to insert it automatically.


How to Modify a Quick Part

If you want to change the content or properties of a Quick Part, you can do so by following these steps:

  1. Insert the Quick Part that you want to modify into your file.
  2. Make the changes that you want to apply.
  3. Select the modified content.
  4. On the Insert tab, in the Text group, click Quick Parts.
  5. Click Save Selection to Quick Part Gallery.
  6. In the Create New Building Block dialog box, choose the same name and gallery as the original Quick Part.
  7. Click OK.

You will be asked if you want to overwrite the existing Quick Part. Click Yes.

Your Quick Part is now updated with the changes.


How to Delete a Quick Part

If you no longer need a Quick Part, you can delete it by following these steps:

  1. On the Insert tab, in the Text group, click Quick Parts.
  2. Click Building Blocks Organizer.
  3. In the Building Blocks Organizer dialog box, select the Quick Part that you want to delete from the list.
  4. Click Delete.
  5. Click Yes to confirm.

Your Quick Part is now deleted from the gallery.


Cool Tips for Using Quick Parts


  • Use descriptive names for your Quick Parts so that you can easily find them in the gallery or type them with F3.
  • Use categories to organize your Quick Parts by topic or purpose.
  • Use keyboard shortcuts to create and insert Quick Parts faster. 
  • For example:
    • Press Alt+F3 to create a new Quick Part from selected content.
    • Press Ctrl+F3 to copy selected content to the Spike (a special clipboard that stores multiple items).
    • Press Ctrl+Shift+F3 to paste all


That's it!

Enjoy.

Please LIKE and SHARE OneCoolTip.com!


READ MORE


OneCoolTip.com
Cool Tech Tips for a Cooler Life!


#QuickParts #MicrosoftWord #MicrosoftOutlook #Outlook #Microsoft @Microsoft #Word #TechTip #OneCoolTIp


Monday, May 1, 2023

Get Your Formatting Right with Gridlines and Ruler in Microsoft Word

Microsoft Word
Are you tired of spending hours formatting your document in Microsoft Word, only to find that it's still not aligned correctly? 

Do you struggle to maintain consistency throughout your document? 

Are you looking for a way to format your document with precision and ease? 

Here's a Cool Tip: Use gridlines and ruler in Microsoft Word

Say goodbye to formatting woes and hello to precise document design.

By default, the gridlines and ruler are not visible in Microsoft Word. 

However, you can easily view them by following these steps:

  • Click on the View tab in the Ribbon.
  • Click on the Gridlines checkbox to show the gridlines in your document.
  • Click on the Ruler checkbox to show the ruler in your document.

Added Cool Tips:  Use the keyboard shortcuts Ctrl + G to show or hide the gridlines and Ctrl + R to show or hide the ruler.

Microsoft Word View Gridlines and Ruler
fig. 1 Turn on Ruler and Gridlines for more precise alignment

Once you have enabled the gridlines and ruler in your document, you can use them to format your document accurately. 

  • Align text: You can use the ruler to set margins, indents, and tabs to align text in your document. You can drag the markers on the ruler to set the desired margins, indents, and tabs.

  • Align objects: You can use the gridlines to align objects such as images, shapes, and tables in your document. You can drag the objects to align them with the gridlines or use the Align options in the Ribbon to align them precisely.

  • Measure distance: You can use the ruler to measure the distance between the elements in your document. You can drag the cursor on the ruler to measure the distance between the elements.


Gridlines and ruler can be useful tools for formatting your document accurately in Microsoft Word.


Please LIKE and SHARE OneCoolTip.com!


READ MORE


OneCoolTip.com
Cool Tech Tips for a Cooler Life!


#MicrosoftWord #DocumentDesign #Gridlines #Ruler #Formatting #Precision #TechTips #WritingTips #Productivity #OfficeTips #DocumentFormatting #TechTricks #WordProcessing #ProfessionalDocuments #SocialMediaTips #ContentCreation #ContentMarketing #TechTips #OneCoolTip @Microsoft 

Monday, March 27, 2023

Why Adding a DRAFT Watermark to Your Word Document Can Save You from Embarrassing Mistakes

Microsoft Word Watermark Icon
When working on a document in Microsoft Word, have you ever shared a document via email, only to realize that you've accidentally sent an incomplete or unedited version of your document? 

Adding a DRAFT watermark to your Word document is a subtle but effective way to indicate that a document is not yet final and can save you from potential mistakes and embarrassment. 

It also provides a visual cue to remind you to review and edit your document before sharing or printing. 

Here's how to add a DRAFT watermark to your Word document:
  • Open your Word document.
  • Click on the Design tab in the Ribbon.
  • Click on Watermark in the Page Background group.
  • Select Draft from the Watermark menu.
  • The DRAFT watermark will be applied to your document.
Microsoft Word Watermark DRAFT
Microsoft Word DRAFT Watermark

Besides several DRAFT options, you can also select Confidential watermarks.

You can also customize your DRAFT watermark by changing its font, size, and color to suit your preferences.  Select Custom Watermark to customize the watermark.

Microsoft Word Watermark Options
Microsoft Word Options

The next time you're working on a document in Word, remember to add a DRAFT watermark for an added layer of protection and professionalism.

Please LIKE and SHARE OneCoolTip.com!

READ MORE

OneCoolTip.com
Cool Tech Tips for a Cooler Life!

#Microsoft #Word #DraftWatermark #MicrosoftWord #DocumentEditing #WritingTips #ProductivityHacks #MistakePrevention #Professionalism #OneCoolTip @Microsoft 

Monday, March 20, 2023

Stay Focused and Productive with this Microsoft Word Cool Tip

Microsoft Word Focus
Do you get distracted when trying to use Microsoft Word?

Wouldn't it be nice if you could star focused?

Here's a Cool Tip:

Use the Focus feature in Microsoft Word.

The Focus feature in Microsoft Word is a tool that allows you to focus on the content you are working on by hiding everything else. 

When you use the Focus feature, everything except the content you are working on will be grayed out, making it easier for you to concentrate on what you are doing. 

This is particularly useful when you are working on a long document or trying to edit a complex section.

How to use the Focus feature in Microsoft Word
  • Open the Microsoft Word document you want to work on.
  • Click on the View tab in the ribbon at the top of the screen.
  • Click on the Focus button.
Microsoft Word Focus Feature
  • The Focus feature will be activated, and everything except the section you selected will be grayed out.
  • To exit the Focus feature, click on the Close Focus button in the top right corner of the screen.

The Focus feature in Microsoft Word is a useful tool that can help you to concentrate on the content you are working on, reduce distractions, and improve editing. 

Stay focused!

Please LIKE and SHARE OneCoolTip.com!


READ MORE

OneCoolTip.com
Cool Tech Tips for a Cooler Life!

#Microsoft #MicrosoftOffice #Focus #Word #OfficeTips #OneCoolTip

Wednesday, March 15, 2023

How to Convert Any Microsoft Office File to a PDF

PDF
Do you need to send someone a Word document but they don't have Microsoft Word?

Don't panic.

You can send them a PDF.

PDFs are a great way to share your documents online. 

They keep the original formatting, layout and fonts of your files, regardless of what device or software you use to view them. 

Here's how to create PDFs from your Microsoft Office files, such as Word, Excel or PowerPoint.
  • Open your Office file and click on File then Save As.
  • Choose a location where you want to save your PDF file and select PDF from the drop-down menu next to Save as type.
Save as PDF
  • Click on More Options and select Optimize for - Standard (online and printing) or - Minimum size (publishing online)
Save as PDF More Options
  • Click on Save and wait for your PDF file to be created.

That’s it! 

You’ve just converted your Office file to a PDF file. 

You can now share it with anyone you want or store it on your device for future use. You can also open it with any PDF reader or editor of your choice.

Please LIKE and SHARE OneCoolTip.com!

READ MORE

OneCoolTip.com
Cool Tech Tips for a Cooler Life!

#Microsoft #MicrosoftOffice #PDF #Word #Excel #PowerPoint #PDFConverter #OfficeTips #OneCoolTip

Monday, March 13, 2023

How to Show or Hide the Ribbon in Office

Microsoft 365
Where's the ribbon?

That's often the question when using Microsoft Office.

The ribbon is a set of toolbars at the top of the window in Office programs, for example, Word, Excel, PowerPoint, designed to help you quickly find the commands that you need to complete a task. 

But a common problem that users encounter is that the ribbon can appear and seemingly disappear on a whim.

Office Ribbon Menu Bar
Microsoft Office Ribbon

Here is a Cool Tip on how to master the Office ribbon.

Expand or collapse the ribbon

You can toggle between having the ribbon expanded or collapsed in multiple ways.

If the ribbon is collapsed, expand it by doing do one of the following:

  • Double-click any of the ribbon tabs.

  • Right-click any of the ribbon tabs, and then select Collapse the ribbon.

Collapse the Ribbon
  • Press CTRL+F1.

If the ribbon is expanded, collapse it by doing do one of the following:

  • Double-click any of the ribbon tabs.
  • Right-click any of the ribbon tabs, and then select Collapse the ribbon
Collapse the Ribbon
Collapse the Ribbon

  • Right-click Ribbon display options in the lower right of the ribbon, and then select Collapse the ribbon.
  • Press CTRL+F1.

Show Ribbon options

  • When the ribbon is visible, in the lower-right corner of the ribbon, click the Ribbon Display Options icon or the down caret icon.
Ribbon Display Options
  • Choose a state for the ribbon:

    • Full-screen mode hides the ribbon for the best view of your document, and only shows the ribbon when you select More , or press the ALT key.
    • Show tabs only shows only the ribbon tabs, so you see more of your document, and you can still quickly switch among the tabs.
    • Always show Ribbon keeps all the tabs and commands on the ribbon visible all the time.

If the ribbon isn't visible at all

If the ribbon isn’t visible at all (no tabs are showing), the state is set to Full-screen mode

Select More  or the three dot icon at the top right of the screen. This will temporarily restore the ribbon.

When you return to the document, the ribbon will be hidden again. To keep the ribbon displayed, select a different state from the Ribbon Display Options menu.

That's it!

Please LIKE and SHARE OneCoolTip.com!

READ MORE


OneCoolTip.com
Cool Tech Tips for a Cooler Life!


#Microsoft #Office #OfficeTips #RibbonControl #OneCoolTip #HowTo #OfficeTricks  @Microsoft

Monday, March 6, 2023

Link Like a Pro: Use This Cool Tip to Add Hyperlinks

Do you find yourself constantly copying and pasting website links into your Microsoft documents? 

Did you know that there's a Cool Tip to insert links using a keyboard shortcut? 
    • Use Control + K as a keyboard shortcut to quickly insert a hyperlink address in Microsoft Word, Excel, and PowerPoint.
Here's how to do it:
  • First, highlight the text that you want to turn into a link.
  • Press the Control + K keys on your keyboard. 
    • This will open the Insert Hyperlink dialog box.
  • In the Address field, type or paste the URL of the website you want to link to.
  • Click OK to insert the link into your document.

Insert Hyperlink Example

That's it!  You've just saved yourself precious time.

This shortcut works in all recent versions of Microsoft Word, Excel, and PowerPoint as well as many other Windows programs.

Enjoy!

Please Like and Share OneCoolTip.com!

READ MORE